Many of us have tried to make our own board for our favorite project. Unfortunately, most do not get the desired results. Usually, our board will need a lot of work to become functional. We’ll no longer, below I’ll present a way of etching the board that really gives perfect results from the first time you try it.
Step by Step Procedure
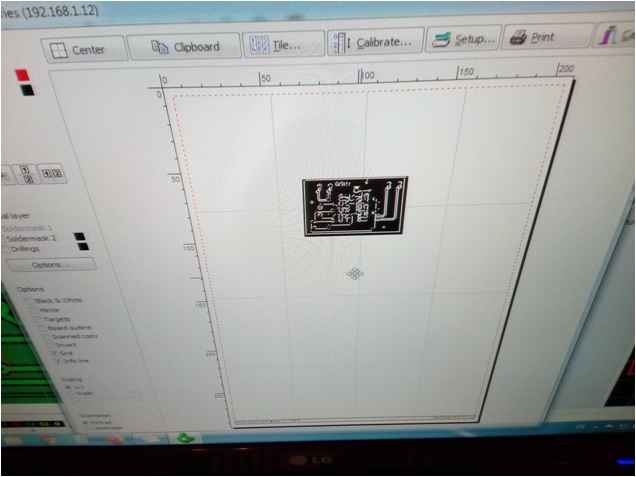
1 First we choose the circuit board design we want to print, or, if we know how to, we design the board we want ourselves by using the appropriate software. So we have the board ready to print.
2 We print the board with a Laser printer on slightly glossy paper, such as one from a quality product catalog (ie from convenience stores, magazines etc). Of course we do not care if it is already printed…
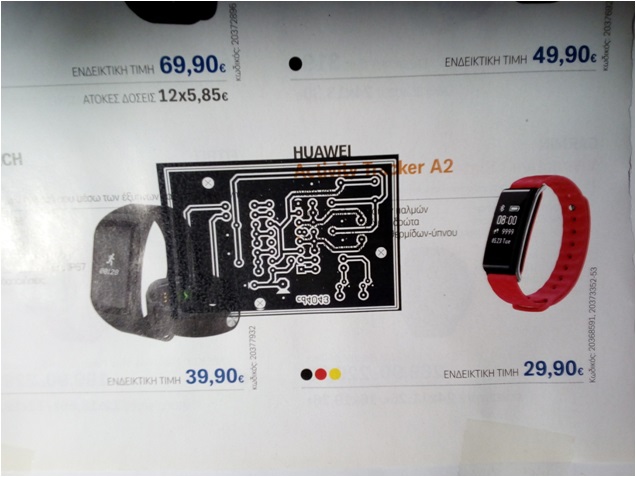
3 After printing, we cut the printed paper around the perimeter of the circuit board image…
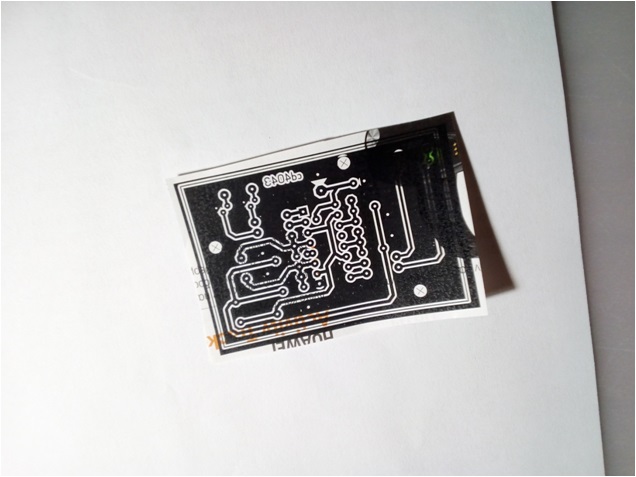
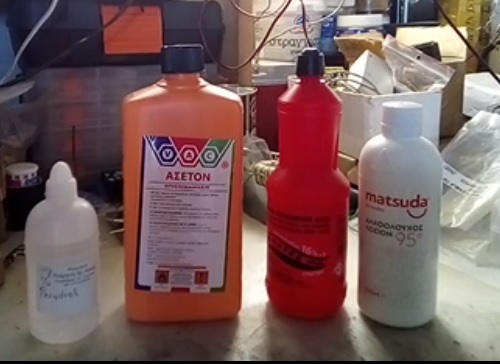
4 Then prepare a solution consisting of 5 parts of acetone (you can find it at a hardware store) and 7 parts of pure alcohol (lotion). With a sprayer we spray the board, which we have cleaned well first. Then place the printed paper on the raw board and press it with your fingers until it dries well.
5 Then place the board with the paper stuck to it, in a bowl of water and wait a while until the paper softens.
6 Remove the paper from the board.
7 Fill the bowl with pre-diluted hydrochloric acid (in the form of a common household cleaning agent, such as “aquaforte”), enough to cover the board, and then slowly add 2-3 caps full of hydrogen peroxide (again a common household item, used as a first-aid disinfectant, such as “perintrol”). Do not put too much in because it will corrode the copper immediately. Prefer to add the hydrogen peroxide gradually, especially if you see that the etching process is slow.
8 Usually, after just 2-3 minutes in the hydrochloric acid – hydrogen peroxide solution (aquaforte-perindrol), the board will be ready.
Caution!! Dangerous gases are created due to the mixture of chemicals in the solution, do this only in open very well ventilated spaces. Do not touch these liquids with bare hands and always use protective rubber gloves adequately certified for these chemicals.
Caution!! Dangerous gases are created due to the mixture of chemicals in the solution, do this only in open very well ventilated spaces. Do not touch these liquids with bare hands and always use protective rubber gloves adequately certified for these chemicals.
9 As you will see in the video, when we remove the board from the solution, we finish it by cleaning it well with acetone, to get the final result.
1
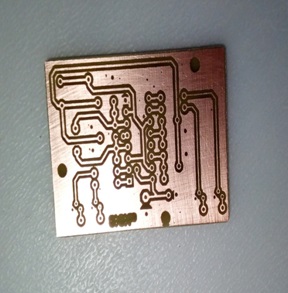
0 The final result – Here is the board cleaned with acetone and then pierced.
Watch the whole step by step process in the video below:
Good Luck!
73 de SV1ELF
George Sofronas
Certified Electrical Engineer T.E.